Tuesday we started to work with Michelle Graf, who works in
the education department of Goddard Space Flight Center in Maryland. She is a part of the BEST program…and it’s
definitely one of the best things I’ve participated in. BEST stands for Beginning Engineering,
Science, and Technology. This program is
designed to help students work through the use of the engineering design
process. We started off the day with the
challenge of making a bug using a hobby motor that would travel by vibrations,
much like how your cell phone moves when it vibrates on a table.
I’ll be honest…my partner and I were horrible at this. If I had been given the same challenge, but
didn’t have to use a motor I would’ve been fine, but that motor aspect threw me
off. But a lot of the other partnerships
made some pretty awesome designs! Then
we went on a tour to the AEE (Ames Exploration Encounter). It’s NASA’s own baby interactive science
museum, and it has some pretty cool things.
I got to walk through an old wind tunnel, try on a (kid-sized, but still
awesome) NASA jumpsuit, play flight control, spin like Kristi Yamaguchi, and
find out how hard it is to plan launches to other areas.
On Wednesday, we got to spend our entire day with
Michelle…and what a day it was! We
started off the morning with a design challenge. We had to build a lunar buggy that we would
test. It had to go down a ramp and
travel at least 50cm, had to hold 2 astronauts (cotton balls), and carry some
lunar cargo (AA battery). Now, that’s a
lot of information missing…that’s where the Engineering Design Process comes
in:
1) ASK: What do we
need to find out in order to solve our problem.
Some of our questions included:
-What is the angle of the ramp?
-What supplies do we have to create our buggy?
-What are the size restrictions?
-Are there any restrictions about securing the cargo or
astronauts?
-Does the buggy need to have any steering mechanisms?
2) IMAGINE: Think
outside the box and synergize. What is
illogical and what are some possible good ideas? This is the time for students to draw things
out and test it in their minds. Michelle
told us we weren’t allowed to know what items we had available to build our
buggies out of until the next stage because she didn’t want us to limit
ourselves based on what we had available.
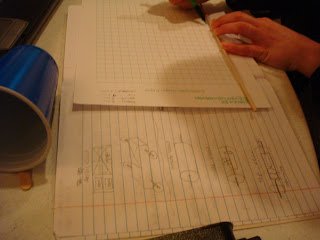
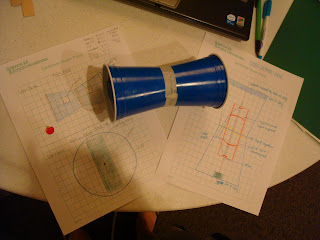
3) PLAN: Pick an idea that seems the most probable and plan it through design plans using the available supplies. We had to draw at least three different views. Most people did a front view, top view, and side view. However, with the design we planned, a front view and top view would look exactly the same. Instead we did a top and side view and a cross-section. We typically tend to rush through this stage because we are overly-excited about getting our hands dirty and actually making something. But Michelle made us spend an agonizing 25 minutes on this part, because the better our drawing plans are, the more thought out the idea becomes.
4) CREATE: The fun
part!
5) EXPERIMENT: Once
our buggy was complete we got to test it out on the ramp. Like with any other experiment, we had to
conduct multiple tests and had only one variable. It was interesting to see all the groups’
designs come to life and see how they performed.
6) IMPROVE: What
steps can you take to make your design function better, and sometimes even look
better?
There is a lot more information on the BEST website: http://www.nasa.gov/audience/foreducators/best/
During our testing, our buggy went 410cm, which was much
more than the 50cm required! After
everyone tested their buggies, we were hit by some unfortunate news…there was
an added part of the challenge! We were
told at that point that we would be dropping our buggies off the stairway of
the nearby commissary…about a 25 foot drop!
My partner and I were devastated because we knew that our buggy (that we
named Infinity because of the shape of its design) would have extreme
difficulties surviving the drop because of its weight. We were given a budget, but to us it didn’t
really matter. The obvious solution was
to create a parachute, but even reinforced grocery bags wouldn’t have held up
Infinity. So my partner and I became
very dejected for the 25 minutes we had to go through the engineering design
process for this added part of the challenge.
With 5 minutes remaining, we decided to fold some cardboard to make a
box, cushion it with 4 grocery bags (which used up our entire “budget”), and
put some tape on top so it would fall out when it exploded upon impact. Imagine our surprise when little Infinity
survived the impact and was still able to roll down the ramp more than
50cm! Of course, it didn’t travel as far
as before because there was a slight crack in the side and the bars of clay
shifted around to make it roll crookedly…but it rolled!
Thursday we did a few more things with Michelle Graf then
took a tour of the Future Flights simulator.
This was basically a facility that deals with the aeronautics aspect of
NASA; it was a mock flight control tower that had screens that gave us a
digital 360-degree view like they would have at an airport. They could change the airport, the weather,
and even our location within the airport.
Then came the awesome part…we went to Mars! Using images collected by Mars rovers Spirit
and Opportunity, we were able to get a 360 degree view of the landing sites of
the rovers.
Friday we made mini rockets that we launched using PVC pipes
and empty 2-liter soda bottles. We
tested out how the trajectory angles affected the distance our rockets would
travel, and had tons of fun stomping on soda bottles. Then for the afternoon, we went to a place
called RAFT – Resource Area for Teachers.
This place has a teacher work area much like an expanded version we have
at our school…die-cuts, laminators, copiers.
But the cool part was the warehouse.
Companies donate supplies in bulk for really awesome experiments and
RAFT makes kits for teachers to use to teach math and science concepts in the
classroom. Put a group of teachers and
future teachers in there and you basically have a group of kids in a candy
shop. My kids next year are going to
have lots of awesome activities to do…and maybe I’ll invite my old babies back
for a visit to try some stuff out as well!


No comments:
Post a Comment